
What’s one of the most important things you need to consider when purchasing body armor? Proper fit. Without this, wearers can be left vulnerable to threats that they otherwise could have been protected against. In addition, a correct fit also has the ability to improve comfort levels for long hours of use and make sure that the wearer is able to function in the capacity necessary to stay safe. Much of this will depend on your intended use case, environment, body type and expectations.
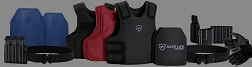
Now, knowing these intricate details can feel daunting, especially when you’re new to body armor and staring at a screen trying to decipher the best products (vests, carriers, armor and side protection) for your needs, but that doesn’t have to be the case! When you have the right resources to empower you to make an educated decision like a blog, a subject matter expert with experience or a friendly voice on the other end of the line that can be a huge help. In this article, the Safe Life Defense Team will walk you through exactly how to select, evaluate, adjust and wear your armor for maximum protection. Let’s find your perfect fit together!
Selecting Your Carrier Style and Size
Covert Carrier Vs. Overt Carrier
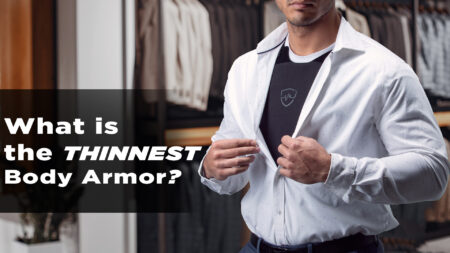
Some people prefer their body armor to be worn under their clothing or duty uniform (covertly), whereas others prefer it to be worn over the top (overtly). The choice is a matter of personal preference and intended use requirements. Safe Life Defense offers multiple options for both instances.
Comfort and Maneuverability
When it comes to the style of your carrier there are certainly plenty of options available. Neck and arms are often a point of contention in this space where movement can become uncomfortable or restricted. You have to be able to move otherwise you become either an easy target or just cover for someone else. We suggest going with a carrier that has a shooter’s cut or a modified shooter’s cut.
Also, consider the materials your carrier is made from along with the weight and thickness. Heavier gear can increase your fatigue levels and excess width can trap your body heat and cause you to sweat (It’s why our carriers are all created with a cooling mesh liner for increased breathability). If your carrier won’t flex that stiffness can also add to your potential risk.
Lastly, take a look at the fastener type(s) used. Oftentimes, we see Velcro, zippers and hook-and-loop closures built into carriers. Take a step back and think about how fast you may need to get into your protective equipment, what’s easiest to use under duress, how customizable it is and how it will hold up over time.
Size Matters
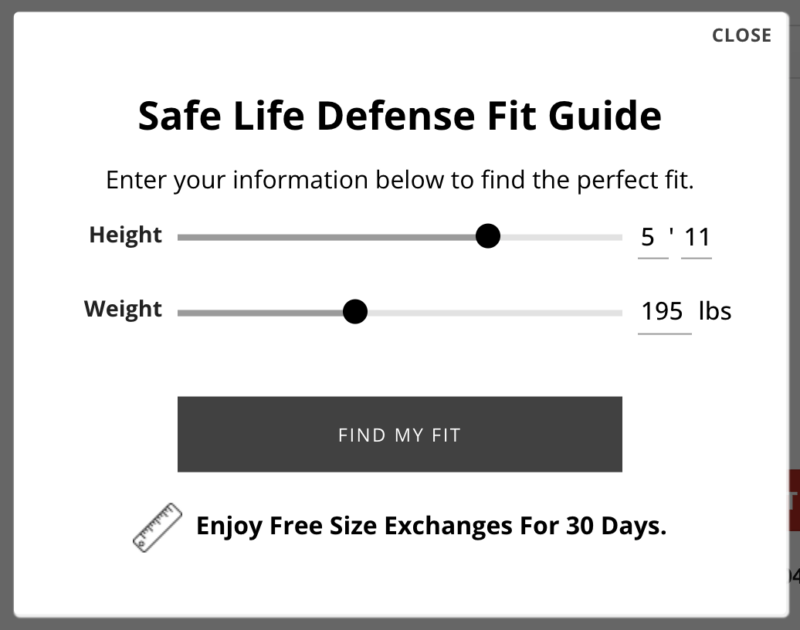
As mentioned above, size is crucial to safety and you must be clear on the unique size charts each manufacturer provides to reference. Although Safe Life Defense follows typical S, M, L, XL labeling, our body armor sizing scale is NOT the same as street clothing. Luckily, we have a free “Find My Size” tool on our website that you can find on any body armor vest page! All you have to do is click the blue button to access the tool and enter your height and weight. You can also cross-reference your suggested size with our size chart.
Fit Considerations for Body Armor
Cuts of Armor
There are several cuts to take into account when exploring your options and today’s market offers far more in terms of variety than ever before. Let’s take a look at them below:
Full Cut: A square or a rectangle with little to no cut at the shoulders. These are often used as backpack plates or for side protection.
Shooter’s Cut: A slight cut at the shoulders to increase the range of motion for the wearer. This is the most common option.
Swimmers Cut: A larger cut at the shoulders that extends further down the sides to increase mobility and range of motion while decreasing the total weight. This option may offer less coverage than a shooter’s cut.
Small Arms Protective Insert (SAPI): A 45-degree cut or close symmetrical clip, often with radius rounded corners that comes in a mil-spec size.
It’s important to note that while any gender can utilize armor, options specific to women are sparse. However, there are plenty of soft armor possibilities that can assist with comfort and correct body armor fit. FRAS® is an excellent choice for ICW wear to achieve rifle protection without sacrificing comfort.
Sizes of Armor
Soft armor panels provide full circumference protection meaning they wrap around your sides and cover a greater surface area. Historically, this was a space where coverage had been lacking in older iterations of armor, but now, it has become a standard to adjust soft panel size in coordination with body size.
Plates, like hard rifle plates or Flexible Rifle Armor generally come in 10” W x 12” H as a standard from manufacturers, but they can also be found in a smaller 8” W x 10” H size, as well as a larger 11” W x 14” H. Inserts used by the U.S. Military can also come in 9.5” W x 12.5” H. If your selection falls outside of the “norm” definitely consider the pocket size of your carrier and whether or not your armor will slide around or just not fit. Some individuals may choose to wear plates that are one size larger than their suggested size for added protection as well. Just make sure that whatever you choose doesn’t hinder your mobility or cause discomfort because anything less than optimal can result in serious injury or a fatality.
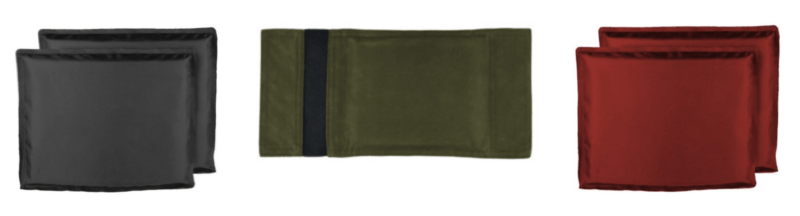
Side armor options aren’t provided by every armor maker out there, but they typically come in 5” W x 7” H and can be placed in special side armor straps for additional coverage. Safe Life Defense has options available in both level IIIA and IIIA+.
If you air on the larger body mass side, don’t forgo choosing bigger plates for smaller ones just because they’re lighter. The size increase is meant to fit your body type and protect your organs. You never want to leave yourself more exposed than necessary.
Self-Structured™ Panels
Self structured™ refers to the manner in which all Safe Life Defense panels are made to support both longevity of use and increased strike resistance. It allows the panel to free float in the carrier without needing an annoying suspension or a Velcro system. Since these panels do not hang from the shoulders they eliminate sagging and distribute the weight of the panel evenly across the body allowing for a much more comfortable armor. The fact that our panels are self structured™ also eliminates curling which plagues many other manufacturers. Curling occurs when the bottom of the panel rolls over onto itself from sitting at the base of the vest. This is something that cannot be repaired and can become costly. It ends up reducing your total coverage area and leaving a ring around the belt of the wearer.
Vest Configuration and Weight Distribution
When inserting your armor, you’ll want to check the labels to determine which side is the front and which side is the back. Labels are typically placed on the side that will face your body. The front of a rifle plate is intended to take on the impact of a threat and is called the strike face. If your body armor has a built-in curve, it should also flow with the natural curve of your chest and upper back. If the concave side of the curve is facing out and sitting more in the lower back, this is not only incorrect but can also cause significant back pain and bring on new health issues.
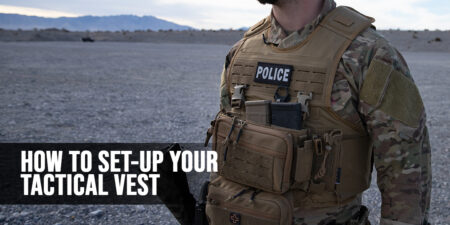
Adding your armor, gear and accessories? Always consider configuration, weight and balance. While your initial setup may feel fine, it’s the long-term comfort and suggested wear that really matters. Effects of a poorly fitted vest or impractical configuration will be felt, especially if you’re suited up for an extended period of time. Seek to place your attached items evenly across your vest and in an accessible, practical location that aligns with your training so you don’t feel lopsided.
Testing – One, Two, Three
Okay, your body armor has arrived and you’re ready to take it for a spin, but where do you start? These things don’t always come with instructions or a how-to guide. Have no fear, you can follow the below guidelines to ensure your armor not only fits right but that it’s comfortable and offers maximum protection, too:

The Rib Cage Rule: Carriers should be centered on your body with the base covering your ribcage. The base of your vest should sit at the top or center of your navel. You don’t want the vest to run too long as it can interfere with your belt (check out our belt options here), but if it’s too short it may not offer enough coverage. As long as it shields your ribcage, it is protecting all of your body’s most vital organs.
The Sternum Check: Poke the center of your chest between your collar bones and align the neck of your vest 1-2 inches below your finger, on the first notch of your sternum. This is where you’ll set and verify the ideal height for your neckline. If your vest fails to align in this area with your optimal belly button positioning, you may need to size up or down to get your center mass fully enveloped by the armor.
The Gap Filler: Secure your side straps from front to back, one side at a time, making sure that they are straight and do not cross. This prevents your vest from riding up or sagging. Your side straps need to be tight enough to eliminate vulnerability gaps in your armor but still allow enough room for unrestrained movement. Your front and rear panels should also be even at the bottom. This aids with unnecessary wear and tear due to rubbing. If there is a slight overlap, you’ll want to have the front panel over top of the back panel. If you have an overlap greater than 1-2 inches you should consider sizing down for increased concealability. If you still have gaps you may want to size up, but if you like the fit or find your weight fluctuates often, you can also consider adding on side armor (Click here to watch how you can install side armor in 4 easy steps.)
The Shoulder Setup: Next, you’ll want to adjust your shoulder straps so they’re nice and snug. They should be tight enough to create a slight pull, but not actually pulling up on the neckline location you’ve now established. If you have wide-set shoulders or a thicker neck girth, you may want to angle your shoulder straps slightly wider than the neutral vertical orientation to aid in comfort. Should you find yourself with extra material in this area, simply fold the fabric under and secure the Velcro straps over the top.
The Back Bulge: A small bump or protrusion may occur with certain body types on the backside of the neckline of a body armor vest. However, this is quite easy to remedy! If you find that this area is sticking out slightly, simply take the front of your shoulder strap off, pull the shoulder of your vest out to the side and fasten the strap straight down onto the Velcro. The back of your vest should now be flat and flush.
The Final Sit Test: Security check! You’re comfortable, you can move with ease, your vest isn’t wiggling around, there aren’t flapping ends, all straps are secure, and (this is the most important part) you take time to make sure you can sit comfortably in your armor.
Need to see a setup in real life? Check out this video where Safe Life Defense CEO Nick Groat personally walks you through how to properly wear body armor:
Getting Comfortable
Finding the best body armor fit will always entail an initial adjustment, but this is essential for its ability to save your life! Think of it as a seat belt, while it’s designed to keep you safe, it won’t if you’re not wearing it right. It’s your responsibility to armor up correctly and make safety the priority while trying to select the most comfortable armor possible. When you first get your vest, we suggest using this blog as a kick-off point for fit so you can wear your body armor the proper way. It’s also advised that you wear it around the house if armor is new to you so you can get used to it and begin the break-in process.
Buying for Others Made Easy
Whether it’s a t-shirt, belt or body armor, it can be difficult to find that perfect gift, let alone fit. With Safe Life Defense’s FREE size exchanges and a satisfaction guarantee, you can confidently choose body armor for someone else! All you need to know is their height, weight and waist size in some cases. Then, they can use this blog to learn how to wear body armor the correct way and be ready for whatever mission is to come. Our goal is always to support you in your purchasing decisions. If at any point you need assistance, we’re here to help. Give us a call at 1-702-829-4029, shoot an email over to Info@SafeLifeDefense.com or use our online contact form here.
 Need to gift someone life-saving equipment, like body armor, but don’t want to go through the hassle of giving a physical present? We’ve got you covered! Cut out the guesswork of online shopping and help them out with a Safe Life Defense e-Gift Card instead. They’re delivered within 1 hour via email, include a personalized gift message and are valid for 5 years. They’ll be able to choose the industry-leading safety gear that fits their lifestyle best! These digital gift cards can be used for anything on SafeLifeDefense.com, as well as products in our Las Vegas Showroom. Recipients can choose from armor like Hyperline™, apparel like hats and T-shirts, accessories like our Triple Mag Pouch, Tourniquet Pouch, and more! Nothing says you care quite like giving the present of cutting-edge protection or new gear that will improve their safety.